Mainframe Forum: A comprehensive repository for programming tutorials and technology news. Got a minute? Click upon those blue words to start learning in Cobol, DB2, CICS, JCL, CA7, APIs, DevOps, Agile, JAVA, SORT, Excel macro, python, and mainframe tools.
This section covers the fundamentals of coding an EASYTRIEVE PLUS
program. It starts with a brief discussion of conventions (rules) for syntax.
Next, there is an explanation of the structure of an EASYTRIEVE PLUS program
that outlines the function and configuration of its segments. Finally, the
Library and Job Activity segments of an EASYTRIEVE PLUS program are discussed
in detail.
Upon completion of this section you will be able to write an
entire EASYTRIEVE PLUS program consisting of:
Coding the file definition
statement.
Coding the field definition
statements for each requested field.
Coding the JOB statement.
Coding the logic portion
using IF statements to select data for a report.
Coding assignment,
calculation, and PRINT statements to perform data movements for the
report.
Coding the report statement.
Coding the report definition
statements.
Syntax Conventions
Syntax refers to the relationships among the parts of a statement.
Syntax refers to the way the parts must be structured, independent of what
these parts say or mean.
Delimiters
B A blank is the basic delimiter. Its purpose is to
separate the parts of a statement.
( ) Parentheses indicate more than one sub-parameter. e.g., HEADING
(‘EMP’ ‘NO’)
: A colon is used to qualify non-unique field names.
e.g., PERSNL:NAME
, A comma is never needed, but is optionally used for
readability.
‘ ‘ Single quotation marks enclose literals, e.g.,
‘TEXAS’
. A period indicates the end of a statement,
e.g.,
IF DEPT = 910. * DEPT 910 IS ACCOUNTING
* An asterisk indicates a comment if it is the
first non-blank character on a statement.
No comments are allowed between
continuation lines.
Statement Continuation
+ A plus sign indicates that the statement continues with the
first non-blank character
in the next Statement Area.
You use the HEADING parameter to specify an alternative column heading for a field. (The default column heading is the field-name.)
Place the alternate column heading within single quotation marks. For example,
CL-NAME 5 20 A HEADING ‘CLIENT NAME’
Produce the column heading CLIENT NAME
MASK
An edit mask is a pattern of characters specifying how non-alphanumeric data is to be printed. Alphanumeric fields cannot be edited. An edit mask is created using combinations of the following characters:
9 Formats digits. Z Suppresses Leading zeroes. * Replaces leading zeroes with an asterisk. - Prints a minus sign prior to the first non-zero digit of a negative number $ Prints a currency symbol prior to the first non-zero digit.
Each digit in the field must be designated in the mask. Any character which follows the last character of the edit mask is printed if the field is negative.
Example Mask Field Result ------------ ------------ ------------ $$, $$9 01234 $1,234
Defining Edit Masks
You can define standard edit masks when your system is installed.
MASK USE ‘(999) 999-9999’ Telephone Number ‘999-99-9999’ Social Security number
Letter names the edit mask to follow. Once a mask is defined, it need not be defined again; simply use the letter.
BWZ (blank when zero) specifies that a field should not be printed if the entire field contains zeroes. BWZ must be coded whenever needed.
Literal is the format of the mask using the characters indicated on the previous page.
Redefining a Field
Sometimes it is necessary to break a field into several parts in order to get the exact information for your report. A birth date, for example, may have been originally entered as one field in a record. Now you want to access this information by either the month, day, or year. With EASYTRIEVE PLUS you can redefine that field in the following manner:
DATE-OF-BIRTH 103 6 N MONTH 103 2 N DAY 105 2 N YEAR 107 2 N
In this exhibit, the MONTH (02) starts in position 103 and occupies position 103 and 104. The DAY starts in 105 and occupies positions 105 and 106. Finally, YEAR starts in 107 and occupies 107 and 108.lves setting aside as an area of storage as a place to keep calculations or other information that is to be created during the running of an EASYTRIEVE PLUS program.
Define working storage by specifying W as the start location.
The values stored in this field are associated with each individual record.
Example GROSS 30 4 N 2 NET 34 4 N 2 WORK-DEDUCT W 4 N 2 HEADING ‘DEDUCTIONS’
Multiplication and division are performed before addition and
subtraction in order from left to right. There must be a space before and after
the arithmetic operators.
Parentheses in Calculations
Parentheses can be used to override this normal order of
operation. Any level of parentheses nesting is allowed. (Operation proceeds
from the innermost level to the outermost.)
RESULTS = GROSS - AMT * 1.3
is the same as:
RESULT = GROSS - (AMT * 1.3)
but different from:
RESULT = (GROSS – AMT) * 1.3
Rounding in Calculations
To round calculations, add a ‘rounding factor’. The ‘rounding
factor’ is composed of a decimal point followed by a zero digit for each
decimal position in the receiving field followed by the digit 5.
NEWFLD
W 4
P 2
JOB INPUT PERSNL
NAME PAY1
NEWFLD = (GROSS *
1.87) + .005
PRINT
The PRINT statement makes
data available for output to a report.
PRINT report-name
Example
IF REG = 25
PRINT RPT1
END-IF
Only records with a 25 in the REG field are output to the report.
SORT is an activity that sequences an input file on fields
specified as keys. SORT uses the interface to your system sort. You can sort on
as many fields as your system allows.
SORT file-name-1
TO
file-name-2
+
USING (field-name [D]
…)
+
NAME sort-name
[ BEFORE proc-name ]
File-name-1 is the input file to be sorted.
File-name-2 is the output file.
USING field-name identifies those fields from file-name-1 that you use as sort
keys. Specify sort keys in major to minor order.
D optionally sorts the field contents in descending order (default = ascending
order).
NAME sort-name identifies the sort activity for documentation purposes.
Example
FILE PERSNL FB ( 150 1800 )
NAME
1 10 A
DEPT
11 5 N
GROSS-PAY
16 4
P 2
FILE PAY-SORT FB ( 150 1800 )
SORT PERSNL TO
PAY-SORT
+
USING ( DEPT GROSS-PAY ) +
NAME SORT-EXAMPLE-1
SORT Procedure
You use SORT procedure to select only certain records for sorting
and / or to modify the contents of records before a sort.
A SORT procedure immediately
follows the SORT statement.
You invoke a SORT procedure
with the BEFORE parameter.
The SORT procedure executes
for each record from file-name-1 prior to passing the record to the sort.
Example
This example illustrates the use of the SORT activity and SORT procedures.
FILE PERSNL FB (150 1800)
NAME 1 10 A
DEPT 11 5 N
GROSS-PAY 16 4 P 2
FILE PAYSORT F(19) VIRTUAL
SORT-NAME 1 10 A
SORT-DEPT 11 5 N
SORT-GROSS-PAY 16 4 P 2
JOB INPUT PERSNL NAME ACT-1
PRINT RPT1
REPORT
LINE 1 NAME DEPT GROSS-PAY
SORT PERSNL TO PAYSORT USING (SORT-DEPT + SORT-GROSS-PAY D) BEFORE SELECT-SORT
NAME SORT-ACT
SELECT-SORT. PROC
IF SORT-GROSS-PAY GE 500
SELECT
END-IF
END-PROC
JOB INPUT PAYSORT NAME SORT-PROC-EX
** Logic **
GET Statement
The GET statement retrieves the next record of the named file into
the file input area.
GET file-name
file-name - identifies the input file
(EOF) - Test for end-of-file (EOF) when using the GET command.
Example FILE MASTER FB ( 150 1800 )
EMP#
9
5 N
NAME 17
16 A
GROSS
94
4 P 2
JOB INPUT NULL NAME READ-SEQ-MAN
GET MASTER
IF EOF MASTER
STOP
END-IF
IF GROSS > 500
PRINT RPT1
END-IF
REPORT RPT1
LINE 1 EMP# NAME GROSS
* You use NULL in the JOB statement to inhibit automatic input.
PUT Statement
The PUT statement outputs a file sequentially.
Example 1
FILE PERSNL FB ( 150 1800 )
EMP#
9 5 N
NAME
17 16 A
GROSS
94 4 P 2
FILE NEWPAY2 F(20) VIRTUAL RETAIN
NAME
1 16 A
GROSS
17 4 P 2
JOB INPUT PERSNL NAME PUT-EXAMPLE
** Logic **
MOVE LIKE PERSNL TO NEWPAY2
PUT NEWPAY2
The FILE statement describes an input or output file and is coded
in the Library section of an EASYTRIEVE PLUS program. The syntax of the FILE
statement is determined by the type of system you are using to run EASYTRIVE
PLUS programs.
Virtual File Manager (VFM)
VFM provides an easy method for establishing temporary work files
without special job control or file allocation statements. VFM is a sequential
access method for program work files. It dynamically allocates space in memory
for work files when sequencing a report or when producing multiple reports.
When a virtual file is read
back into the program, space is released and becomes available for reuse
unless you code RETAIN on the statement.
If the area in memory
(default is 16k) is exhausted, VFM writes the excess data to a single
spill area on disk.
FILE file-name F
(lrecl) VIRTUAL [ RETAIN ]
F (lrecl) designates the record length.
VIRTUAL causes the file to be created and maintained by the VFM.
RETAIN causes VFM files to be retained for the duration of the EASYTRIEVE PLUS
program execution.
COPY Statement
The COPY statement duplicates the field definitions of a named
file. You can code an unlimited number of COPY statements for any one file.
COPY { file-name }
When the same field-name is used in more than one file in the same
activity, you must qualify duplicate field-names by adding the file-name as a
prefix separated by a colon.
Example
FILE INONE
FLD-ONE
10 1 A
FLD-TWO
11 3 N
FILE INTWO
--> COPY INONE
JOB INPUT INTWO
NAME COPY-EXAMPLE
IF INTWO: FLD-ONE
** Logic **
EXIT parameter
The EXIT parameter on the FILE statement invokes a user routine
for every input or output operation for that file.
You use EXIT to access a
routine that converts non-standard data files that EASYTRIEVE PLUS does
not process directly.
EXIT is not valid for VFM or
IMS / DLI. (IMS / DLI information is contained in APPENDIX D of this
Student Guide.)
The FILE statement and the PUT statement are used to create (load)
VSAM files. The PUT statement provides for sequential file output to VSAM
files.
FILE MASTER FB ( 150 1800 )
EMP#
9 5 N
NAME 17
16 A
GROSS 94
4 P 2
FILE OUTMAST VS ( CREATE RESET )
JOB INPUT MASTER NAME
CREATE-VSAM
PUT OUTMAST FROM MASTER
STATUS
IF OUTMAST: FILE-STATUS
NOT ZERO
DISPLAY ‘LOAD ERROR
STATAUS IS : ‘ +
OUTMAST : FILE-STATUS
STOP
END-IF
PRINT RPT1
REPORT RPT1
LINE 1 EMP# NAME GROSS
STATUS
When you specify STATUS, VSAM return codes are returned to the
system defined field FILE-STATUS.
FILE-STATUS
FILE-STATUS is a system defined field which you can test to
identify the result of a VSAM input / output operation.
The CALL statement invokes an external subprogram. Usually, the
CALLed program is an existing program in another language that performs an
unsupported function.
CALL program-name [NR] USING ( field-name … )
MOVE Statement
You use the MOVE statement to transfer data from one location to
another. MOVE is useful for moving data without conversion and for moving character
strings with variable lengths.
You can move a field or a
literal to a field or move a file to a file.
A sending field longer than
a receiving field is truncated on the right.
A longer receiving field is
padded on the right with spaces or an alternate fill character.
Spaces or zeroes can be
moved to one or many fields.
MOVE NAME 20 TO HOLD-NAME
MOVE NAME CTR TO HOLD-NAME FILL ‘*’
MOVE SPACES TO NAME, HOLD-NAME, HOLD-DIV
MOVE LIKE file-name-1 TO file-name-2
MOVE LIKE
MOVE LIKE moves the value of fields with identical names from one
file to another while converting numeric data-types from one format to another.
The rules for the assignment
statement also apply to MOVE LIKE.
Because the same field-name
can be used in more than one file, you must qualify duplicate field-names
by prefixing the field-name with the file-name and a colon.
User Procedures (PROCs)
A user PROC is a group of user-written EASYTRIEVE PLUS statements
designed to accomplish a task. You use a user PROC when identical logic is needed
in several places in the activity.
A user PROC must be invoked in the activity with a PERFORM
statement.
PERFORM proc-name
proc-name. PROC
** Logic **
END-PROC
Proc-name
Proc-name is the same name as in the PERFORM statement and is followed
by a period, a space, and the keyword PROC.
END-PROC
Every PROC must have an END-PROC. At END-PROC, control returned to
the statement following the PERFORM statement that invoked the PROC
START / FINISH parameters
You use the optional START and FINISH parameters of the JOB
statement to automatically incorporate procedures into processing activities.
Hello! and welcome back to another exciting tutorial on EASYTRIEVE Program. In this Easytrive tutorial, you'll learn the basic structure of an Easytrive program. You'll get a flavor of the Easytrieve program. Let's start with today's tutorial with an introduction to the Earyteive program sections.
Easytrive Introduction.
Easytreive on the mainframe is a data retrieval programming language. Easytrieve is generally used for creating custom reports, extract data. Let's focus on an Easytrive sample reporting program.
Easytrive Program Structure.
The Easytrive program generally has three different sections (i.e. environment section, library section, activity section). Each section has its own significance. Let's look at each section in detail.
ENVIRONMENT Section.
An Easytrive Environment section optional. It is generally used to change the default parameters of the system environment. The PARM keyword is used to specify the new parameters.
For example- PRAM LINK (EZTBPGM2)
LIBRARY Section.
The Easytrive Library section specifies the input and output file used in the program. This section is also used to define the working storage fields for the program logic.
For example - FILE PERSNL
Note: In the above mention example, PERSNL is the name of a file used in an easytrive program.
ACTIVITY Section.
The last section of an Easytrive program is the Activity Section. This is a mandatory section and it is to specify the business logic of the program. The activity section can have any number of small tasks in the form of paragraphs. Each paragraph represents a set of business rules or logic as per need.
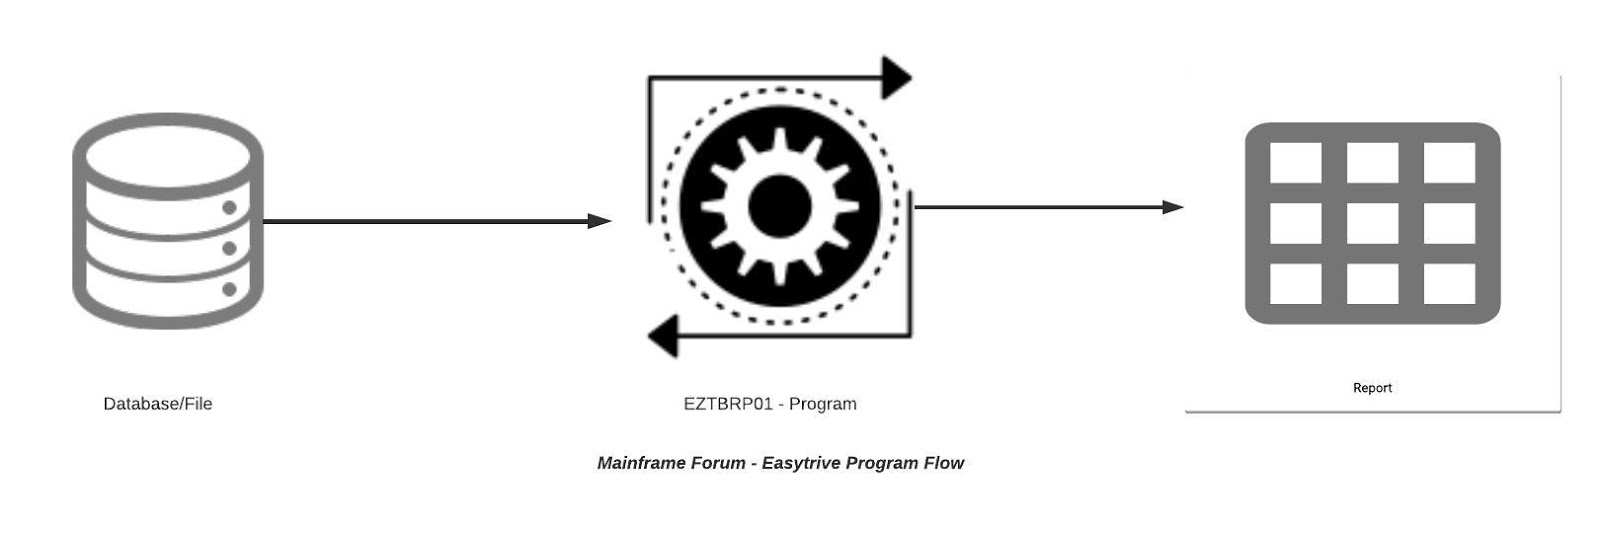
Mainframe Forum - Easytrieve Program Flow
Easytrive Sample Reporting Program.
Program Name: EZTBRP01
Description: EZTBRP01 is an easytrive program, that generates reports in specific formats.
Generation Data Group (GDG) is a concept that has been widely adopted in mainframe computing, where managing large volumes of data is a critical task. A GDG is a collection of two or more chronologically related versions of the same data set, stored as separate generations. This allows organizations to efficiently manage data while retaining access to historical versions for disaster recovery, auditing, and other purposes.
In this article, we will take a closer look at what GDGs are, how they work, and why GDGs are essential for mainframe data management. From their definition, and evolution to their use in modern mainframe environments, this article will provide a comprehensive overview of the world of Generation Data Groups (GDG) in Mainframe.
A Generation Data Group (GDG) is a collection of two or more chronologically related versions of the same data set, stored as separate generations. This allows for efficient management of data and the ability to access historical versions of the data set. GDGs are commonly used in mainframe computing, where data is frequently processed in large batch jobs and where keeping multiple generations of the data set can be important for disaster recovery and auditing purposes.
What are the benefits of using GDGs in the Mainframe?
The following are some benefits of using Mainframe Generation Data Group (GDG):
Efficient Data Management: GDGs allows for the efficient management of large volumes of data by storing multiple generations of the same data set, reducing the need for manual organization and management.
Access to Historical Data: With GDGs, organizations have access to historical versions of their data sets, which can be important for disaster recovery, auditing, and compliance purposes.
Improved Data Retention: GDGs can help organizations retain important data, such as backups and archives, for longer periods of time, reducing the risk of data loss.
Increased Data Security: By storing multiple generations of data sets, GDGs can improve data security and reduce the risk of data breaches or unauthorized access to sensitive information.
Streamlined Backup and Recovery: GDGs can simplify the process of backing up and recovering data, allowing organizations to quickly recover critical data in the event of a disaster.
Better Data Auditing: By keeping multiple generations of data sets, GDGs can improve data auditing and make it easier to track changes and maintain compliance with regulatory requirements.
Improved Resource Utilization: GDGs can help organizations optimize resource utilization by reducing the need for manual data management and allowing for more efficient use of storage and computing resources.
How do you define a Mainframe GDG (Generation Data Group)?
To define a Generation Data Group (GDG), you must create a catalog entry for the GDG, and create a model data set control block on the same volume as the catalog entry for the GDG. Additionally, you must create a GDG catalog entry, by invoking the VSAM utility program, AMS, and issue a DEFINE GDG command.
Specifies the name of the generation data group. This name follows normal data set naming conventions but is limited to 35 characters.
LIMIT
Specifies how many generation data sets are to be maintained in the group. The maximum limit is 255.
EMPTY | NOEMPTY
Specifies what action should be taken when the LIMIT value is reached. EMPTY means that all generations should be removed from the group. NOEMPTY means that just the oldest generation should be removed.
SCRATCH | NOSCRATCH
Specifies whether the data sets that are removed from the group should be scratched (deleted) or just un-cataloged.
TO | FOR
Specifies an expiration date or a retention period for the GDG.
Sample JCL to define a generation data group (GDG)
Note: In above mention example, the job would define the new Generation Data Group (GDG) base (i.e. RCTM.EMPPAYRL.MNTH.GDG) with a limit of 30. We have used IDCAM's utility to define, however same can be achieved FILE-AID / FILE-MANAGER or using ISPF utility.
Provide the name of the GDG catalog entry that is to be deleted.
GDG
Specifies that the entry to be deleted is a generation data group.
PURGE
Deletes the catalog entry even if the expiration date hasn’t been reached. When used with FORCE, it deletes the catalog entry and the GDG members even if any of their expiration dates haven’t been reached.
FORCE
Forces the GDG catalog entry and all of its members to be deleted, assuming that the expiration dates have passed or that PURGE is coded.
Sample JCL to delete a generation data group (GDG)
In conclusion, the Mainframe Generation Data Group (GDG) is an essential tool for managing and organizing data in mainframe environments. With its ability to efficiently manage large volumes of data, provide access to historical data, simplify backup and recovery processes, improve data auditing, and optimize resource utilization, GDGs provide a comprehensive solution for organizations that rely on mainframes for their data processing needs.
As data management continues to evolve and become more complex, GDGs will remain a crucial component of mainframe data management, ensuring that organizations can effectively manage their data and meet the demands of their growing business.
►Subscribe to Topictrick & Don't forget to press THE BELL ICON to never miss any updates. Also, Please visit mention the link below to stay connected with Topictrick and the Mainframe forum on -